
Blog
How to Choose Nail Drill Bits for Salon Work
Nov
A nail drill is only as controlled as the bit in its handpiece. The wrong bit can turn a clean removal into heat, friction and unnecessary filing, while the right one makes prep sharper, appointments smoother and finished sets look genuinely premium. Knowing how to choose nail drill bits is therefore less about collecting every shape available and more about matching material, grit and purpose to the service in front of you.
For working nail technicians, a well-planned bit selection protects your timing as much as it protects the natural nail. Whether you are refining acrylic, removing gel polish, detailing around the cuticle or carrying out a professional pedicure, each bit should earn its place in your kit.
Start with the service, not the shape
It is tempting to buy bits because they look useful, particularly when a new flame or cone shape promises a quicker finish. Start with what you perform most often instead. A salon focused on extensions needs reliable removal and refining bits. A natural-nail or BIAB service menu benefits from gentle prep and cuticle-detailing options. Pedicure work requires purpose-made bits that are suitable for skin and hard skin services.
The key distinction is this: some bits are designed to work on enhancement product, while others are designed for skin or delicate detailing. Do not treat them as interchangeable. A carbide removal bit that handles acrylic efficiently is not a cuticle bit, and a fine diamond flame bit is not the tool for bulk removal.
Before adding to your collection, consider the materials you work with, your average appointment volume and the level of your technique. Beginners usually need a concise, dependable edit. Experienced technicians may benefit from more specialist shapes for intricate work, but more choice only helps when you understand the purpose of every bit.
Nail drill bit materials explained
The material determines how the bit performs, how it feels against product and how you should use it. It also affects cost and longevity.
Carbide bits for product removal
Carbide bits have sharp, engineered flutes that cut through enhancement product rather than sanding it away. They are a professional favourite for reducing acrylic, hard gel and builder gel efficiently. Because they remove product quickly, they can significantly reduce hand filing time.
The trade-off is that carbide demands control. Use light pressure, keep the bit moving and work at a speed appropriate to both the bit and your e-file. Never allow it to sit in one area, particularly close to the natural nail. Choose a fine or medium carbide for most controlled removal work; coarse options suit very thick product or experienced technicians who understand their e-file fully.
Pay attention to flute direction too. Right-handed and left-handed bits are not a marketing detail. A bit should rotate so that it cuts smoothly in your natural working direction. Using the wrong direction can create dragging, discomfort and a less polished result.
Ceramic bits for cooler removal
Ceramic bits are often chosen for their smooth feel and lower heat build-up during removal. They are effective on gel and enhancement product, and their light-coloured surface makes product dust easy to see during a service. They are particularly popular with technicians who want a gentle, controlled removal experience.
Ceramic can be more brittle than carbide, so it needs careful handling and storage. If dropped, inspect it closely and replace it if there are cracks, chips or rough edges. A damaged bit does not belong in a professional service.
Diamond bits for prep and detail
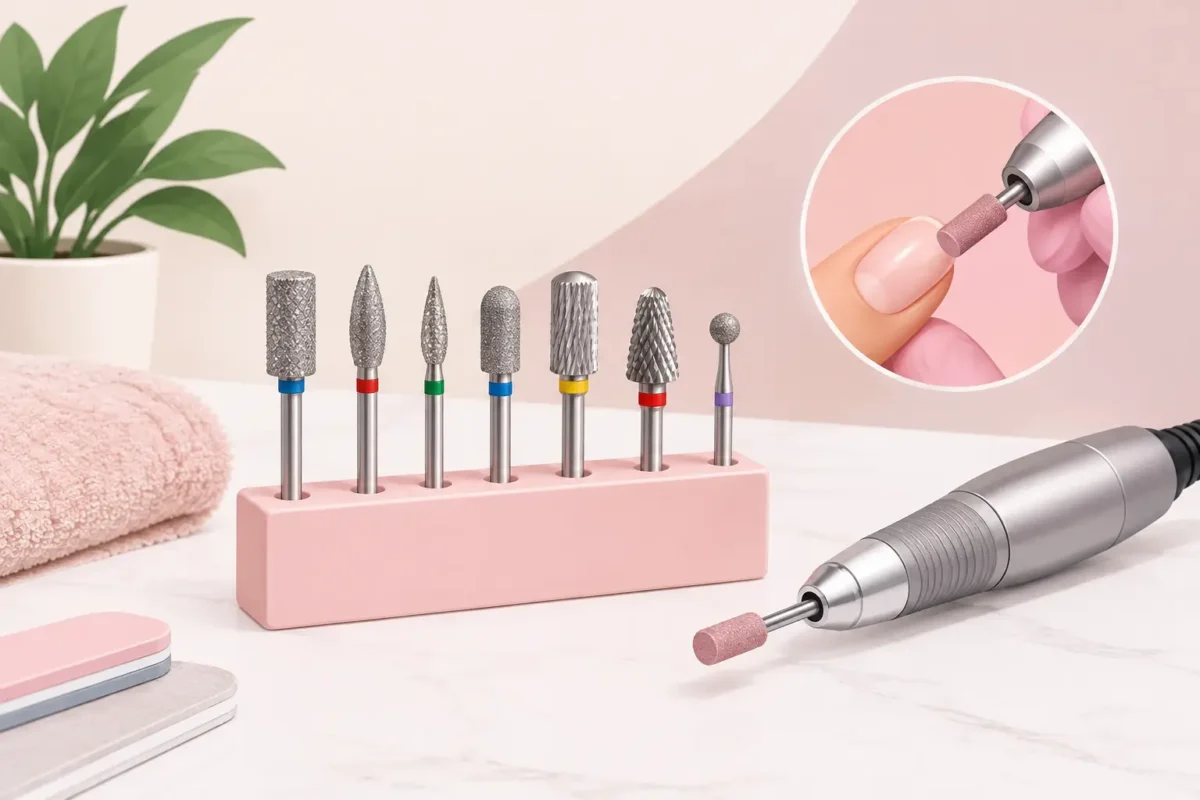
Diamond bits have an abrasive surface rather than cutting flutes. They are excellent for precise cuticle work, gently lifting non-living tissue from the nail plate, refining sidewalls and supporting dry manicure techniques. Common shapes include flame, ball, needle and tapered barrel.
Choose fine diamond grits for most natural-nail and cuticle detailing. They offer control without becoming aggressive. Coarser diamond bits have a place in pedicure work and more resistant skin, but should never be used casually on the nail plate or living tissue.
Sanding bands for flexible prep
Sanding bands are practical, affordable and useful for surface refinement, shaping and product removal when paired with a suitable mandrel. They are single-use, making them a strong option for hygiene-conscious salons.
The rule is simple: choose fine bands for natural nail preparation and medium bands for refining product. Coarse bands can remove material rapidly, but they leave little margin for error. They are not the right shortcut for natural nails.
Choose the grit with intention
Grit is not a measure of quality. It is a measure of how aggressively a bit abrades or removes material. The best grit depends on the job, the client’s nail condition and your confidence with the tool.
Fine grit is your everyday essential for gentle prep, finishing and controlled detail work. Medium grit is versatile for shaping and reducing product. Coarse grit is for efficient bulk removal on enhancements, not for speeding through every appointment.
A common professional mistake is reaching for a coarser bit to save time when technique is the real issue. If removal feels slow, first check your speed, pressure, product thickness and whether the bit is suitable for the system you are removing. Faster is only better when the natural nail remains protected and the client stays comfortable.
Match the shape to the task
Bit shape affects reach, precision and safety. A barrel bit has a broad working surface, making it effective for reducing product across the enhancement. Safety-top barrels are a sensible choice near the cuticle area because their rounded top reduces the risk of accidental gouging.
Cone and tapered barrel bits are useful for refining around the sidewalls and under the free edge. Flame bits follow the curve of the proximal nail fold, which makes them ideal for detailed cuticle work in trained hands. Ball bits are generally used after lifting cuticle to remove small areas of non-living tissue and create a neat finish.
For pedicures, larger barrel, disc and cone shapes can address callus and rough skin efficiently. This is a separate skill set. Use pedicure bits only within your training, avoid broken skin, and refer clients to an appropriate medical professional where there are signs of infection, severe cracking, inflammation or a condition you are not qualified to treat.
Check compatibility before you buy
Most professional e-files accept a standard 3/32-inch shank, but do not assume every bit will fit every machine. Check your handpiece specification and make sure the shank sits securely with no wobble. A poorly fitted bit compromises both control and the lifespan of your e-file.
Also check whether your bit is designed for forward or reverse use, particularly if you are left-handed or work in a busy salon where equipment is shared. The handpiece must be switched off before changing a bit, and the bit should be fully inserted and locked according to the machine instructions.
Quality matters here. A precisely manufactured bit runs true, feels balanced and helps you work with confidence. Cheap, poorly finished bits can vibrate, dull quickly and make controlled work much harder. A professional kit does not need to be excessive, but it should be dependable.
How to choose nail drill bits for a starter kit
For a practical first selection, build around the services you actually offer. A fine diamond flame bit for detail work, a small ball bit for finishing lifted cuticle, a safety-top medium carbide or ceramic barrel for product reduction, and fine single-use sanding bands cover a great deal of salon work when used with correct training.
Add specialist bits only as your confidence and menu grow. If you regularly perform pedicures, invest separately in appropriate pedicure bits and education. If you predominantly work with soft gel, a fine to medium ceramic or carbide option may be more useful than a very coarse bit. If you create structured overlays, prioritise a refining bit that lets you work accurately around the cuticle without over-filing.
This focused approach also makes cleaning and organisation easier. Store bits by service type and grit, ideally in a clean, dry holder that prevents them knocking together. Clear organisation helps you select the right tool quickly rather than making a rushed choice mid-appointment.
Hygiene, maintenance and client comfort
Every reusable bit must be cleaned and disinfected between clients according to the manufacturer’s instructions and your salon hygiene protocol. Remove visible dust and debris first, then use a suitable cleaning method and disinfectant for the bit material. Do not use damaged, rusty or clogged bits, and never share disposable sanding bands between clients.
During the service, client feedback matters. Excessive heat, vibration or discomfort is a signal to stop and assess. It may mean too much pressure, too high a speed, a clogged or worn bit, incorrect movement, or simply the wrong bit for the task. The e-file should support your technique, not replace it.
A high-performance service comes from controlled product application, correct bit selection and a technician who knows when to switch back to a hand file. That attention to detail is what turns an efficient appointment into Fashion For Fingers worth coming back for.
