
Blog
Best Glitter Gels for Nails for Salon Sets
Nov
A glitter set can look expensive under the salon lamp, then disappoint the moment a client steps outside. The best glitter gels for nails are not simply the brightest pots on the shelf. They give even sparkle, controlled application, reliable curing and a finish that earns its place on a premium service menu.
For nail techs, glitter is a commercial classic. It photographs beautifully, suits every season and can turn a straightforward gel manicure into a higher-value appointment. The difference is in choosing a formula that works with your technique, your lamp and the look your client has actually booked.
What Makes the Best Glitter Gels for Nails?
A professional glitter gel should carry enough glitter to create impact without becoming thick, rough or difficult to level. When the gel is overloaded with particles but lacks a well-balanced base, it can drag under the brush, leave bald patches and create unnecessary bulk at the sidewalls. That is not Fashion For Fingers. It is extra filing time.
Look first at glitter density. A densely packed gel is ideal when your client wants full coverage in one or two controlled coats. Fine particles tend to create a smooth, luminous finish, while chunkier mixes give more obvious dimension and flash. Neither is automatically better. It depends on whether you are creating a polished glazed sparkle, a party-ready full set or detailed nail art.
The suspension base matters just as much. A quality gel should hold glitter evenly rather than allowing it to sink, clump or gather at the base of the pot. It needs enough movement to self-level in a thin layer, yet enough control that it does not flood the cuticle area. For busy salon work, that balance saves minutes on every appointment.
Finally, judge the cured surface. Some glitter gels need to be encapsulated for a smooth finish, especially those with larger pieces. Others sit neatly enough for a top coat alone. Knowing which finish you are buying prevents surprises when it is time to refine the shape.
Choose Glitter by Finish, Not Just Colour
A rose gold glitter gel may look gorgeous in the pot, but its particle size and base tone determine how it performs on the nail. Choosing by finish gives you a more useful working kit than collecting similar shades that all achieve the same result.
Fine shimmer gels
Fine shimmer gels are the salon staple. They offer soft light reflection with minimal texture, making them ideal for full colour, French details, ombré fades and bridal nails. Silver, champagne, soft pink and warm gold are particularly versatile because they sit comfortably alongside sheer nudes, milky whites and deeper gel colours.
These formulas are often easier to top coat smoothly. They also work brilliantly as a delicate overlay on a plain colour when a client wants sparkle without committing to a fully glittered set.
Full-coverage glitter gels
For maximum impact, choose a gel with stronger particle concentration and rich colour payoff. These are the shades clients request for birthdays, festive appointments and statement extensions: molten gold, vivid pink, emerald, sapphire and high-shine black glitter.
Apply in thin, deliberate coats rather than trying to load the entire effect on at once. A thick glitter layer may appear opaque before curing but can create uneven structure, wrinkling or incomplete curing if it is outside the recommended use for your lamp and system.
Reflective and flash glitter gels
Reflective glitter is made for content. Under ordinary salon lighting it can look refined, then burst into a dramatic sparkle when hit by flash or direct light. It is an excellent add-on for clients who love a reveal video, but it needs to be presented honestly. The high-flash effect is not always as visible in daylight, so show the client both looks before they choose.
Because reflective glitter can be more textured, check whether it needs encapsulation. A carefully floated layer of clear builder or structure gel can protect the design and create the smooth finish clients expect when they run a hand over their nails.
Chunky mixes and confetti effects
Chunky glitter gels bring personality to encapsulated designs, abstract accents and seasonal sets. They are less suited to a sleek, ultra-thin manicure unless the particles are very flat. Place larger glitter with intention rather than brushing repeatedly over the same area, which can disturb the base and make the surface uneven.
For a cleaner result, use them on one or two feature nails, within a clear structure layer or as part of a carefully planned glitter fade. Full coverage can work, but it demands more product control and refinement.
Match the Formula to the Service
The right glitter gel changes with the appointment. On natural nails, a fine shimmer or low-profile glitter gives glamour without adding unnecessary thickness. On builder gel overlays and extensions, you have more scope for encapsulated reflective glitter, larger particles and layered art.
If your client wants a quick gel polish appointment, select a glitter that applies evenly and cures cleanly in the recommended number of coats. A dense pot that needs extensive placement and encapsulation may be beautiful, but it belongs in a longer, higher-priced nail art service.
For French tips, a gel with a creamy, non-running base gives sharper smile lines. For ombré, a glitter that can be feathered without leaving hard edges will make your blend look intentional rather than patchy. For chrome-style effects, a fine metallic gel can offer a more practical alternative when the client wants sparkle with less rubbing powder around the desk.
Application Habits That Keep Glitter Looking Premium
Glitter shows every uneven area, particularly under strong salon lights. Start with thorough prep, a correctly applied base and a smooth foundation. If the underlying enhancement is lumpy, no amount of sparkle will hide it.
Stir the gel gently when required, especially after it has been standing. Do not whip air into the pot. Pick up a small amount, wipe one side of the brush and guide the product close to, but not into, the cuticle. Thin coats cure more predictably and are easier to keep tidy.
With a sparse glitter gel, use a light patting motion to place particles where coverage is needed, then float the brush to level the surface. With densely packed glitter, avoid overworking. Too many strokes can move particles away from the free edge and leave the finish inconsistent.
Cure for the full time specified for the product and lamp combination. Never guess because the surface feels dry. A glitter gel can appear set while layers below have not cured correctly, particularly if application is too thick. Finish according to the formula: either top coat directly or encapsulate, refine and then top coat for a glass-smooth result.
Build a Glitter Edit That Clients Will Book
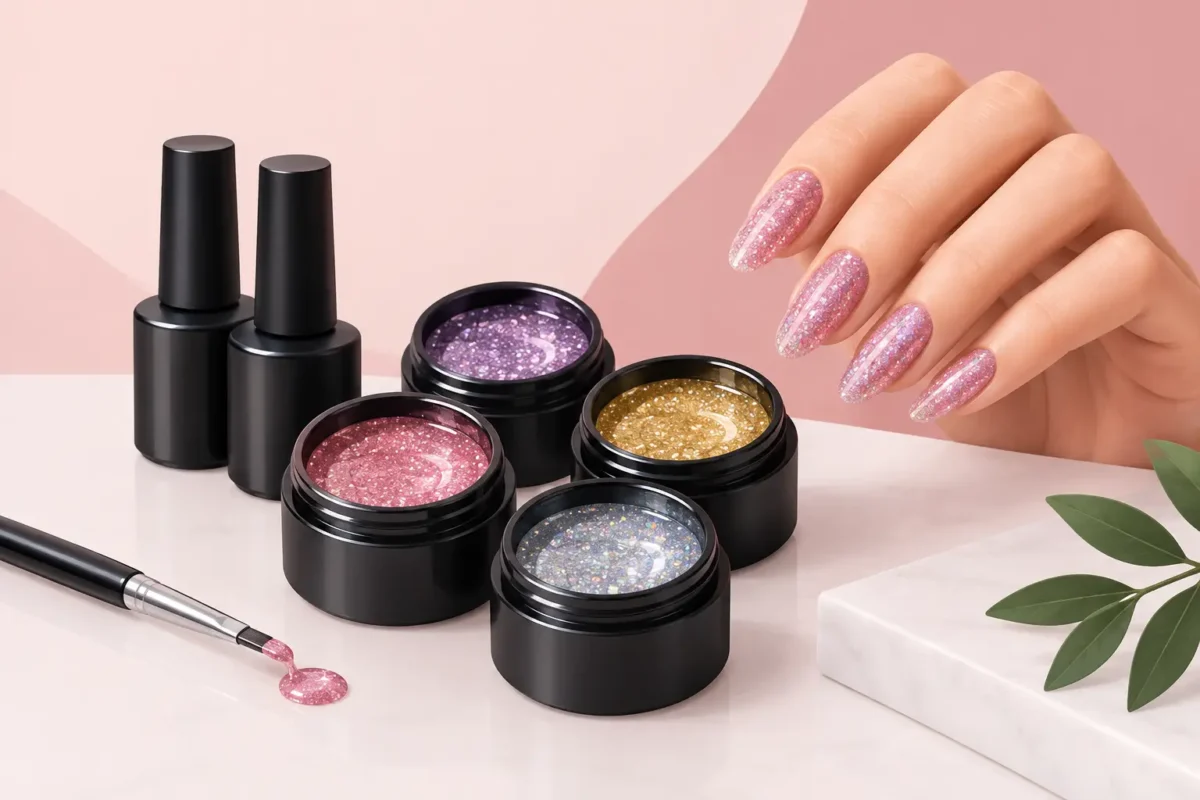
You do not need every glitter shade to offer choice. A tightly chosen edit is more profitable, easier to display and faster to use. Start with versatile neutrals: silver, soft gold, champagne and rose gold. Add statement brights that suit your client base, then one or two trend-led finishes such as reflective silver or a multi-tonal iridescent mix.
Think about the colours already popular in your salon. If clients regularly choose blush BIAB, a pink pearl shimmer and champagne micro-glitter will earn their keep. If your booking diary is packed with long sculpted sets, bolder chunky mixes and saturated full-coverage glitter are more likely to sell.
Swatch every glitter gel on the same clear tip, black tip and a neutral base. This gives clients a realistic choice and helps you see whether a shade is transparent, buildable or genuinely opaque. Photograph swatches under standard salon lighting and flash so your social content reflects the finish clients can expect.
The Professional Checks Before You Buy
Glitter is a visual purchase, but performance should lead the decision. Check that the product is designed for professional nail use, works with the curing lamp you use and has clear instructions for application and removal. Confirm whether it is intended as a gel polish colour, art gel or encapsulated effect, because these formats behave differently.
Also consider pot size and price per service, not only the upfront cost. A higher-density glitter may require less product per nail and give quicker coverage, making it the stronger salon buy. Equally, a less concentrated shimmer may be better value if it is your go-to overlay shade used across dozens of appointments.
Nail Gaga’s professional range is built for technicians who want fashion-led finishes without compromising on practical salon performance. Choose the effect that suits the service, apply it with control and let your swatches do the selling before the client even sits down.
